Post Time:Aug 16,2012Classify:Success StoriesView:3725
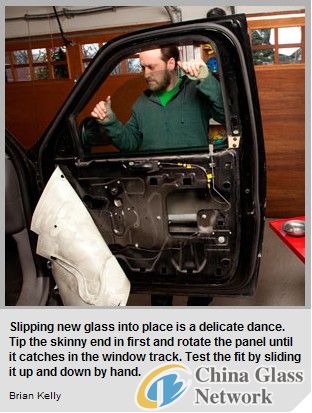 Petty theft from your car is a double pain—in addition to losing the stolen items, you usually need to replace a smashed side window. Repairing the damage yourself is one way to ease the loss.
You get a pretty nasty knot in your stomach when you discover your vehicle's side window has been smashed and the interior ransacked—ask me how I know. On top of whatever was taken, there's the added injury of getting the car repaired. Between the time it requires to file a claim with the insurance company and the inconvenience of taking the car to the shop, fixing the window yourself can sometimes save a lot of headaches. Professional glass repair, including new glass and labor, has a frustrating tendency to cost exactly a few dollars less than an insurance deductible, so doing it yourself can save a ton of money. With a few pointers and some savvy parts sourcing, that unprotected hole in the door can be fixed in no time.
Remove and Replace
With the inner door panel removed, peel back the plastic vapor-barrier sheet carefully, as you will need to reinstall it later. You should be able to see the door's innards. Raise or lower the window-height-regulator mechanism to its service position—a height where the bolts or screws holding the glass remnants to the regulator align with access holes stamped in the steel. Crank windows make this easy; on power windows, plug in the switches on the loose inner door panel and turn the ignition to the "on" position; operate the window until the bolts align with the access holes. Vacuum broken glass from the door cavity; spending extra time here now avoids rattles later.
Next, remove the seal at the bottom of the window to open up the slot the glass panel needs to fit through. Finally, free one of the window tracks for fore-and-aft play that will make the install easier. These tracks guide the panel's path and are bolted along the bottom of the door.
Wriggling the new glass into place is tricky. Drop the shorter side in first at a near-90-degree angle and try to catch the long side of the glass in its track, then rotate the short side up. After a few tries the glass will slip into place. Attach the glass panel to the regulator (ask a friend for help) and bolt the window track down, then run the new glass up and down to ensure that the motion is satisfactory. The remainder of the work: Put the door together in reverse order. Hopefully you took good photos.
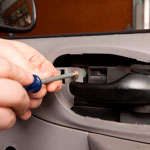
[ 1 ] To remove the inner door panel, look for nuts and bolts hidden behind trim.
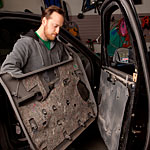
[ 2 ] The door panel is usually one big piece with components such as armrests bolted on.
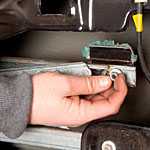
[ 3 ] Loosen the screws on the regulator to free the leftovers.
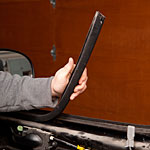
[ 4 ] Pull the lower window seal, making a wider slot to slide the new panel in.
QUICK TIPS
- Interior designers work hard to hide the screws and clips holding the door together, so peek under and behind places you wouldn't normally look.
- Tools you'll need include screwdrivers and a socket set, but a trim-removal tool will help a lot. It makes popping off clips and retainers much easier than with a screwdriver.
- Since we're dealing with glass, wear a heavy long-sleeve shirt, full pants, covered shoes, gloves, and safety glasses. Tempered glass is safer than plate, but still treat it with respect.
- When handling glass, be very methodical and don't force anything. If getting something to fit is too hard, you're not doing it right. Step back and examine the situation again.
- Take pictures in sequence to remember how everything goes together. Keep removed parts in a cup or on a tray so they don't get lost.
Source: www.glassbytes.comAuthor: shangyi
PrevThe Glass With a High Performance Low-E
UH Physics Researcher Develops Nanoparticle Coating for Solar PanelsNext